
Getting your new Practice Chanter from J Higgins
Posted by Griffin Hall on 19th Sep 2019
Unpacking your new instrument is always a thrill! Here are some basic steps to getting your new practice chanter into playing shape!
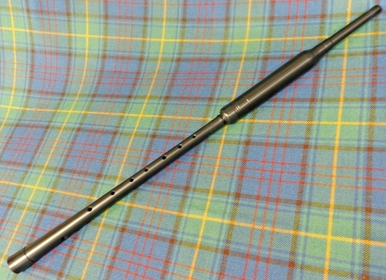
Your chanter should come packaged in two separate pieces. Unwrapping these parts will give you two sections of your practice chanter. They are called the "Top" and "Bottom" pieces. The Top is where you blow into while the Bottom is where you put your fingers when you play.
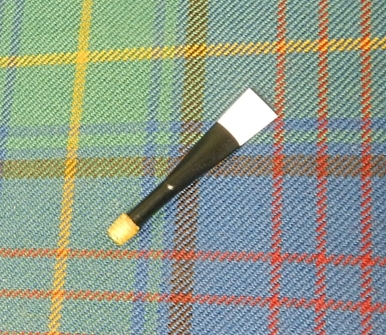
Carefully check the Top Section. You should see a piece of tape covering the hole where the Bottom fits. Uncovering this piece of tape will reveal your reed. Be very careful with this reed. While it is plastic, it can still be damaged if it is knocked or handled incorrectly.
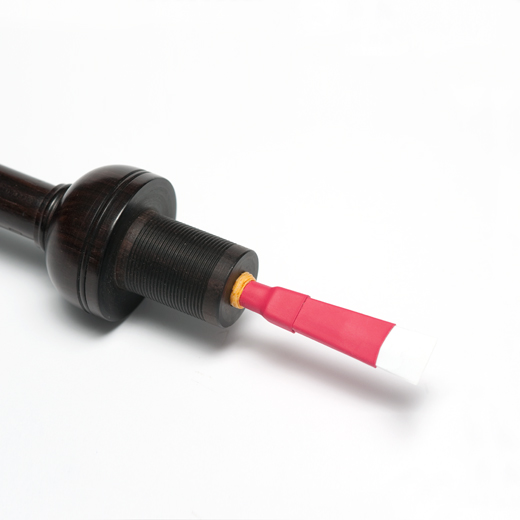
At the bottom of the reed, you will notice some yellow string. This is called hemp and it's how the reed sits comfortably into the reed seat of the chanter Bottom. Gently push the reed into top of the Bottom section where the hole is. Don't use too much force but you should see just the last few strands of hemp. You don't want the reed to accidentally fall out.
With the reed secure, place the big hole of Top section of the chanter onto the Bottom section where the hemp is. Your chanter should now be complete! Remember, if you've ordered a wooden chanter from us, you'll never want to turn it from the very bottom of the chanter as this could break it. Turn it from the bowl which is just below where your reed sits. With that in mind, you're ready to start playing. Try blowing through the mouthpiece of the Top and sound should come out from the Bottom. Your reed is vibrating, where you can now place your fingers down below and begin your playing!
Feel free to get in touch with us about any questions or comments!
- Call us on 800-426-7268
- Email us at: admin@jhiggins.net